Tyro - Eftpos in Odoo Integraton Module

Stage 1 - Configuring your own Tyro Eftpos Terminal through Odoo.
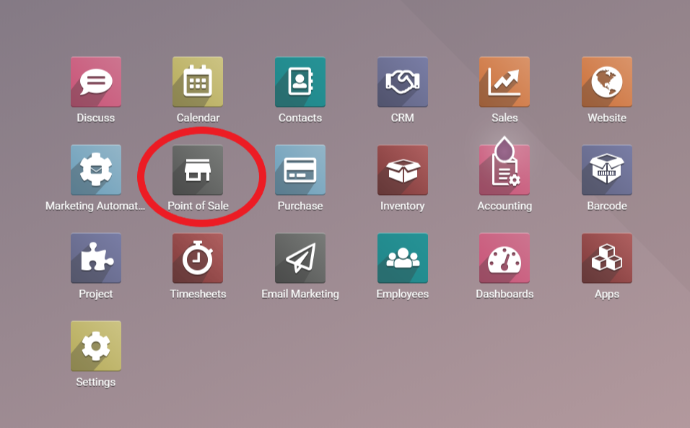
Step 1
This is your Odoo landing page. There is a variety of categories to select from, but to configure your Tyro Eftpos machine, you first need to select Point of Sale.

Step 2
Once selected, five tabs can be found at the top of the screen on the left hand side. Select Configuration.
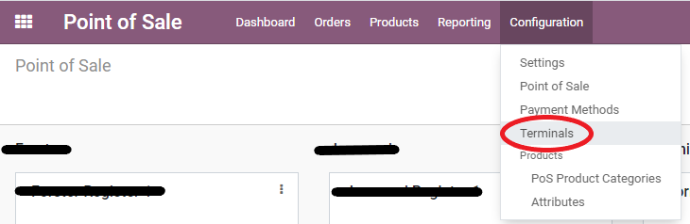
Step 3
After selecting Configuration, a drop down menu will appear. From this menu, select Terminals.
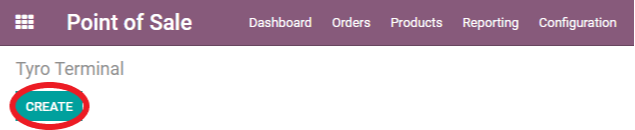
Step 4
Once Terminals is selected, the page will be blank except for a Create button located at the top of the screen on the left hand side. Click on Create.
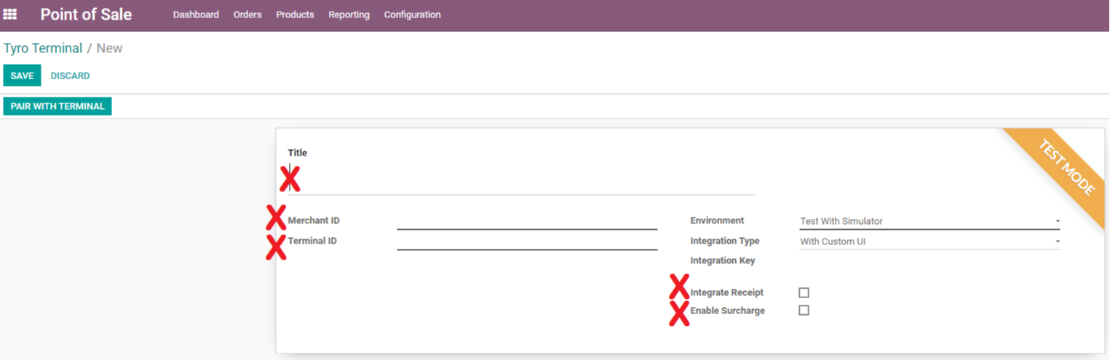
Step 5
Each section of the page marked with a red cross requires you to input information.
Create a title for your Tyro terminal
Input your merchant ID
Input your terminal ID
Your API KEY will be populated for you automatically
- Test with physical device: for a testing environment with the actual physical device
- Test with simulator: for a testing environment without the physical device
Integration type: a customised UI built for Odoo will be selected for you
Other options:
Integrate receipt: if not ticked, the Tyro device will print the receipt on its own. Odoo will use the device connected to Odoo to print both the standard Odoo receipt and the Tyro receipt will come out from its terminal. When printed with a Tyro terminal, the payment amount will be shown but we don’t have the details of the transaction (since the information on this ticket comes from Tyro and not Odoo). If this option is ticked, Tyro sends the information to Odoo to print a single, integrated receipt.
Enable surcharge: For this option to be enabled, Odoo requires that you add a product that is a service. If you intend to charge customers a surcharge on every transaction, this option should be enabled.
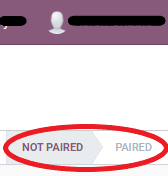
Step 5a
Notice that on the top right of your screen, under your account, the status of your terminal pairing is displayed. At this stage, your screen will display not paired, and will not deviate from this until step 7.

Step 6
Looking at the top of your screen on the left hand side, three buttons are visible, save, discard and pairing with terminal. It is crucial that before pressing anything else, the save button is selected.

Step 7
Once save is selected, the title of your terminal will now be displayed next to the Tyro Terminal / heading, and the save and discard options have been replaced with edit and create options. The pairing with terminal option remains the same, and can now be selected.
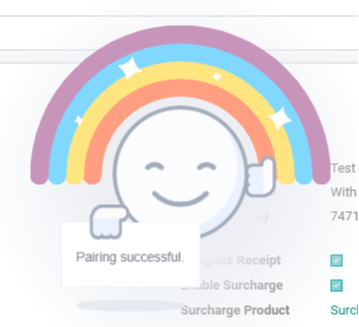
Step 7a
If you have followed the above steps correctly, upon clicking the pairing with terminal button, the icon pictured in the adjacent image will appear.
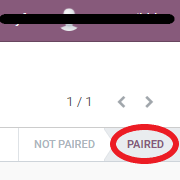
Step 8
Looking at the top right of your screen, under your account, the status of your terminal pairing is displayed. Previously, the not paired option was highlighted, but as all steps have been successfully completed, the status of your terminal is now paired.
Stage 2 - Create a payment method for the terminal you have just created.

Step 1
From the options bar appearing on the top left of your screen, select configuration. From the drop down menu that appears after selecting configuration, select payment methods.
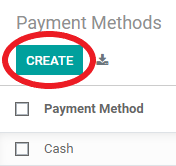
Step 2
Click create. Cash will be listed under the payment method heading. Once this step is completed, your Tyro terminal will appear underneath.

Step 3
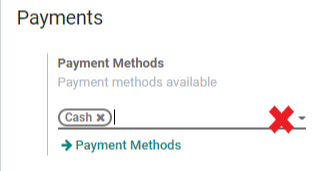
The two options marked with a red cross require information. The first red cross is where you need to input the name of your terminal. The second red cross is where you need to select the payment terminal, which will be Tyro.
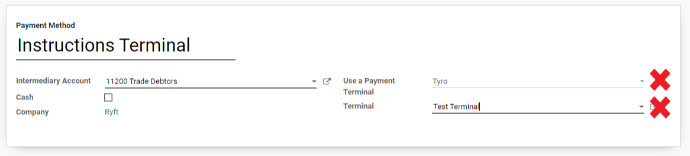
Step 4
Once you select Tyro, another option will appear asking you to select a terminal. Your Tyro terminal that you created in stage 1 will appear from the drop down menu, select this terminal.
Step 5
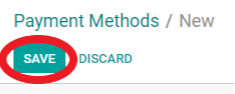
Once you have input all the necessary information. Click the save button, located at the top of your screen on the left hand side.
Step 6
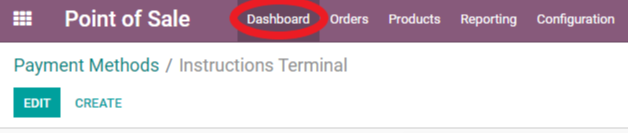
Once you have saved your information, select dashboard from the options menu at the top of your screen on the left hand side.
Step 7
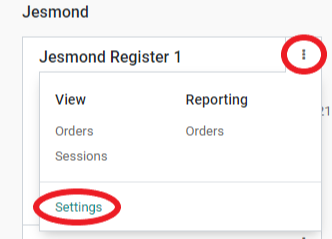
Any register that you have set up within Odoo, will appear under the dashboard option. To access the settings for each register, click the three dots in the top right corner of the register box, and from the drop down menu that appears, select settings.
Step 8
Once you have selected settings, a variety of subheadings and settings options will appear. Scroll down until you see the Payments heading on the left hand side of the page. The payment methods currently available to you will be displayed, and cash will be the only option displayed. Click the drop down arrow to select your newly created terminal to add it as a payment method.
Step 8a
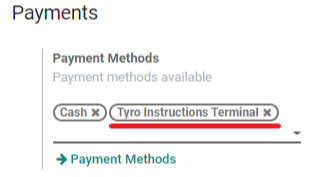
Once you have clicked the drop down menu and added your terminal as a payment method, it will appear next to cash, as seen in the image on the left.

Step 9
Once you have input your Tyro terminal as a payment method, click the save button located at the top of the page on the left hand side.
Stage 3 - Commence Transactions
Step 1
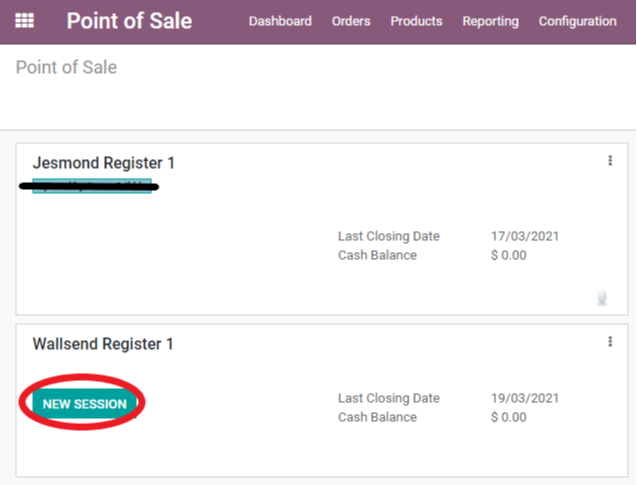
Click dashboard to view all your available registers. Select New Session for the register you wish to use.
Step 2
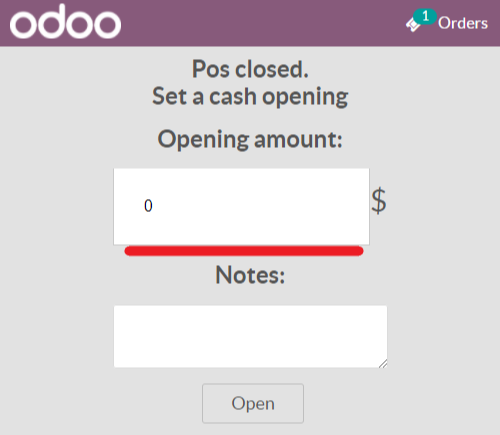
You will be prompted to input your opening cash amount. Once you have input your information, click Open.
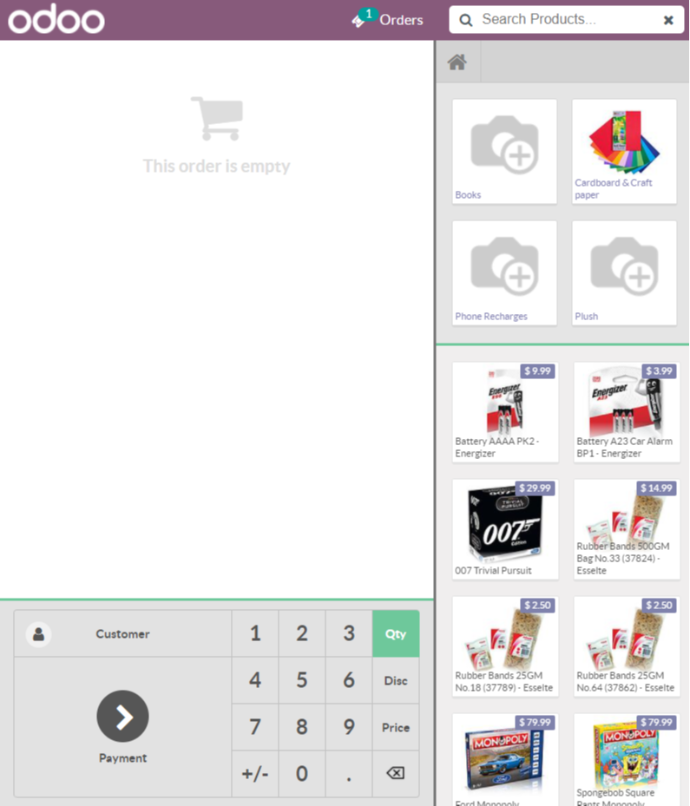
Step 3
Once Open has been selected, your sales screen will open. Although your listed products will differ from those shown in the image on the left, the basic layout will be the same.

Step 4
Once you have selected your desired product for the transaction, it will appear at the top of your screen as shown in the image on the left. To proceed to payment, select the payment button (circled in red).
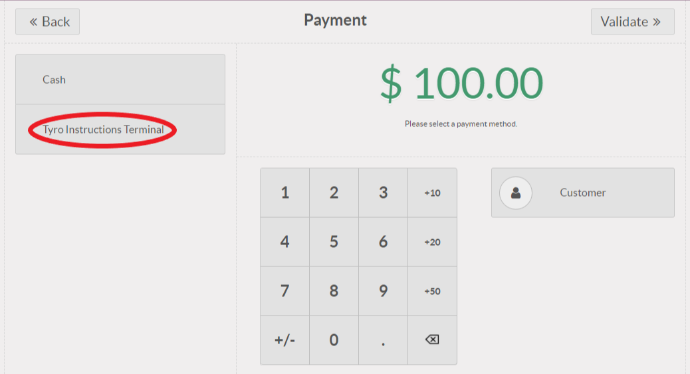
Step 5
Once payment is selected, your screen will look the same as the image on the left. On the left hand side, your options of payment method are displayed. Select your Tyro terminal.
Step 6
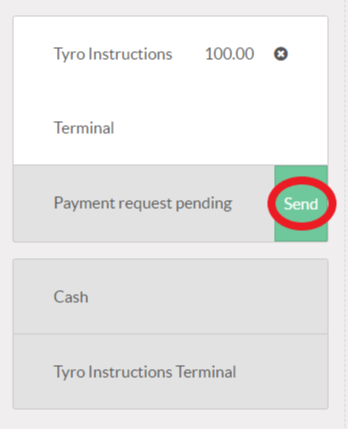
In order to successfully process your payment, you need to select the Send button. This will send your payment request to Tyro.
Step 7
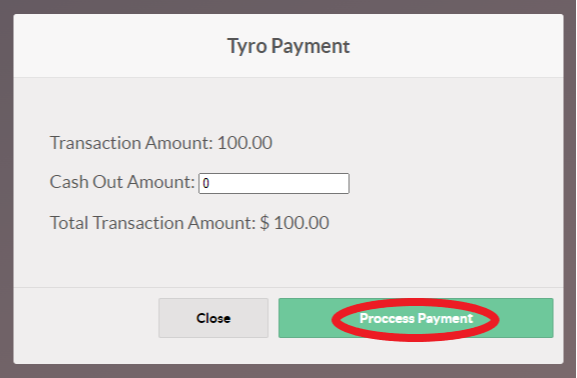
The final pop up that will appear before the purchase is processed, is the option to include a cash out amount with the transaction. It will automatically have 0 in the box unless you alter the amount.
Click the Process Payment option.
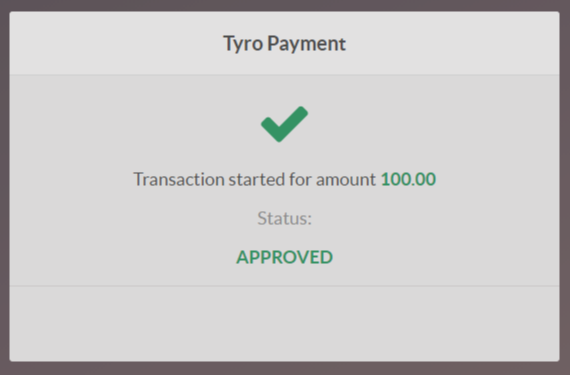
Step 8
Your Tyro transaction will be processed quickly, and this pop up will only appear briefly (once Approved by Tyro) before your display proceeds to the next step of the transaction.
Step 9
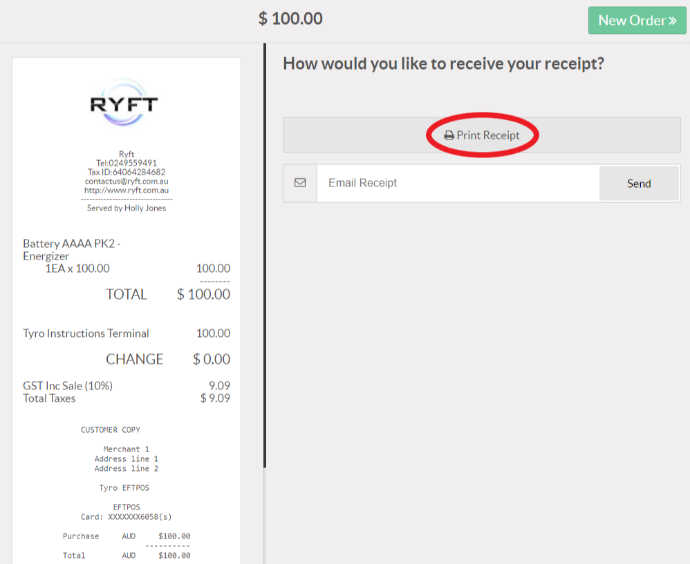
Once your Tyro transaction has been successfully processed, your screen will display an image of the receipt, and offer the option to Print Receipt (it is connected to the printer you have already configured) and/or to have a copy of the receipt emailed to the customer.
To enable another transaction to be commenced, select the New Order button located at the top right of your screen.